|
 |
|||||||||||
|
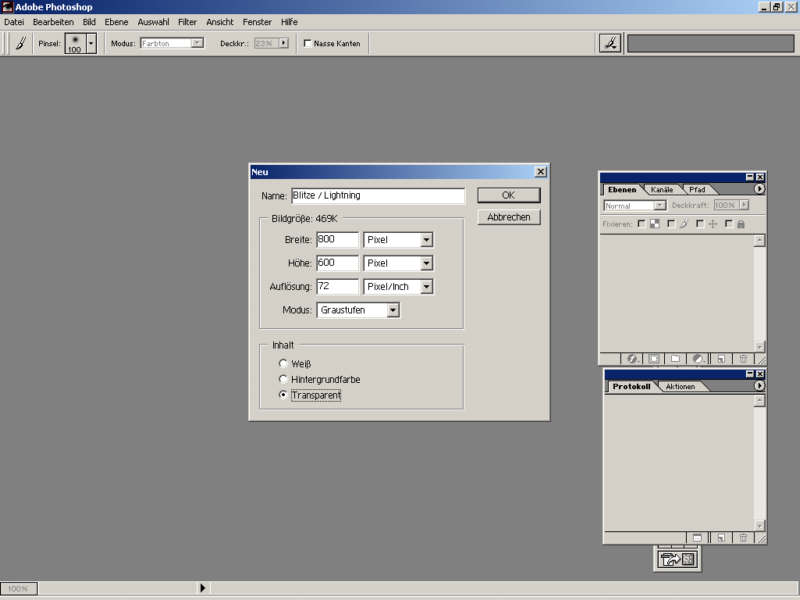
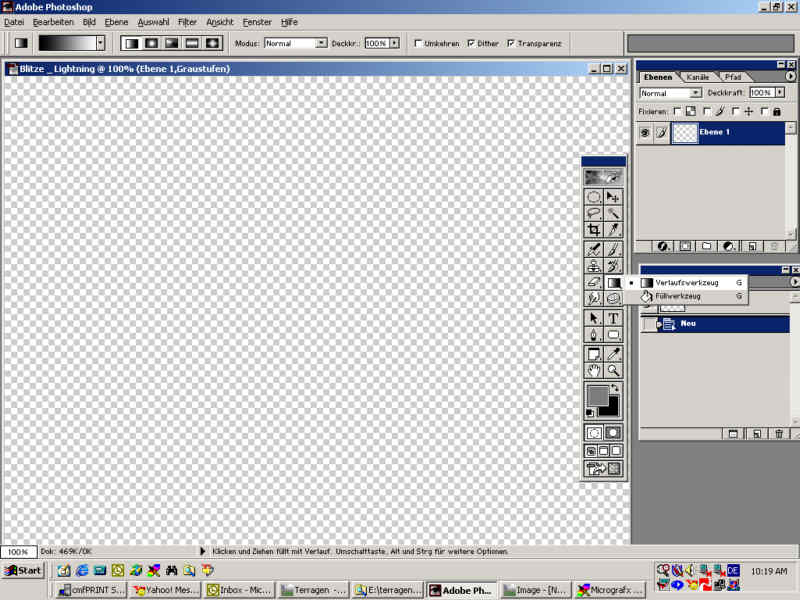
How to create lightning with Photoshop Applications required: Photoshop or other advanced graphics software This in fact is a tutorial about how to generate
lightning using Photoshop in general. It doesn’t matter if you’re using
a Terragen picture or a photograph. Well,
let’s go:
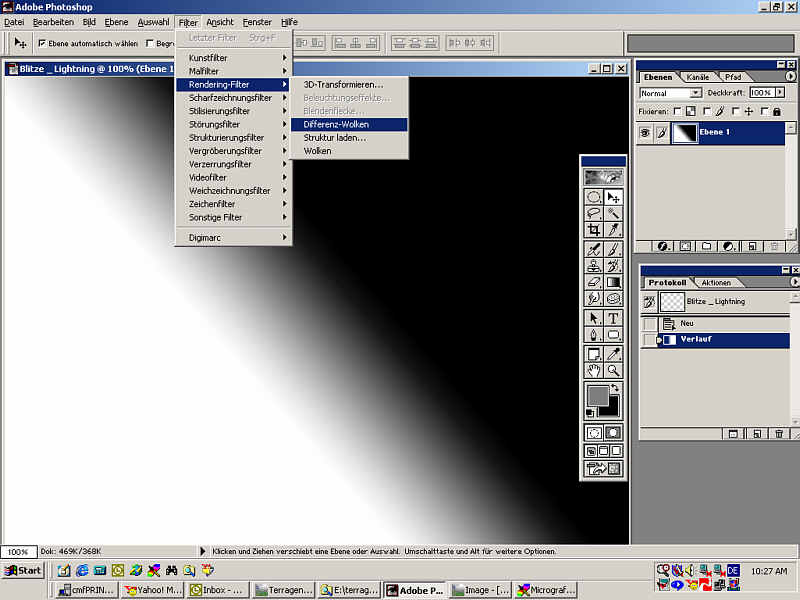
Now we need to apply a black and white gradient diagonally from one edge to another.
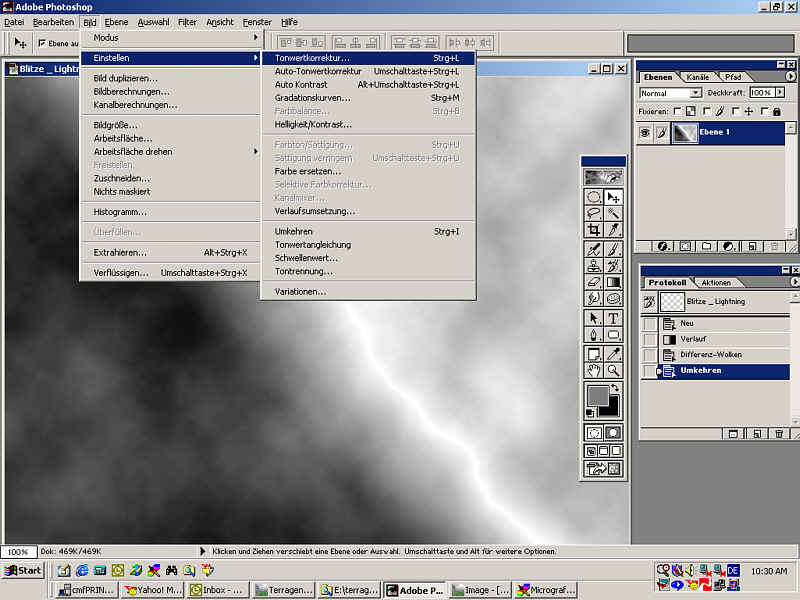
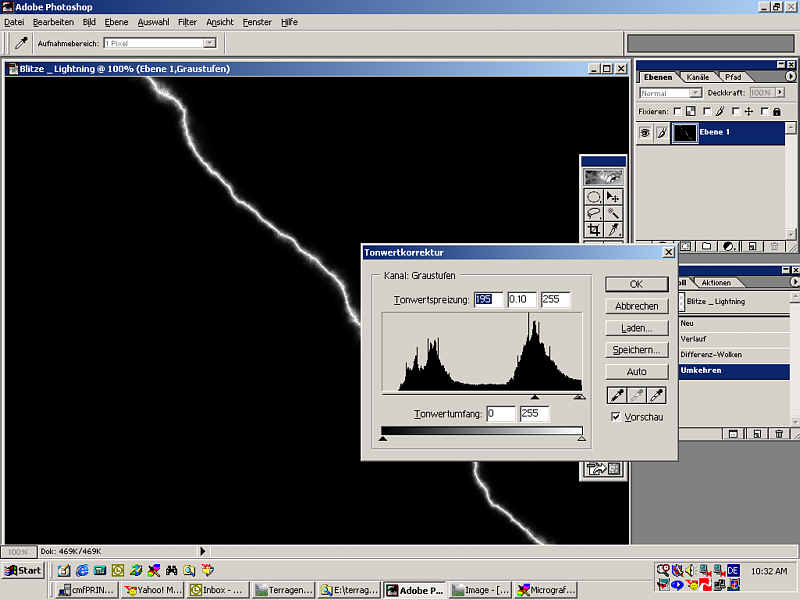
Attention: do not stretch the gradient tool across the entire picture. This is important for the definition of the lightning bolt later on. When you draw the gradient only partially into the middle of the picture, we will get a single lightning bolt, which runs relatively straight. If you draw the gradient line too much across, we will partially receive unwanted cicle structures in our lightning, which of course we do not want. I recommend using short gradient lines, like shown in the picture below: Now we apply the „difference cloud“ filter. We now do invert the picture. Either using the menu or using the keyboard with Strg + i. Now you can already spot what will be our final lightning bolt shape. It’s time to adjust the levels using strg + l. In the upcoming dialog, we need to slide the three arrows below the cart along the axis. Slide the middle arrow completely to the right. The left slider at least 2/3 of the axis to the right, too: Ok, now we have a well defined bolt. It appears to
be quite straight, which is because we chose to have a short gradient
line previously. Try to experiment with the gradient width and watch
how the appearance of the lightning bolt changes.
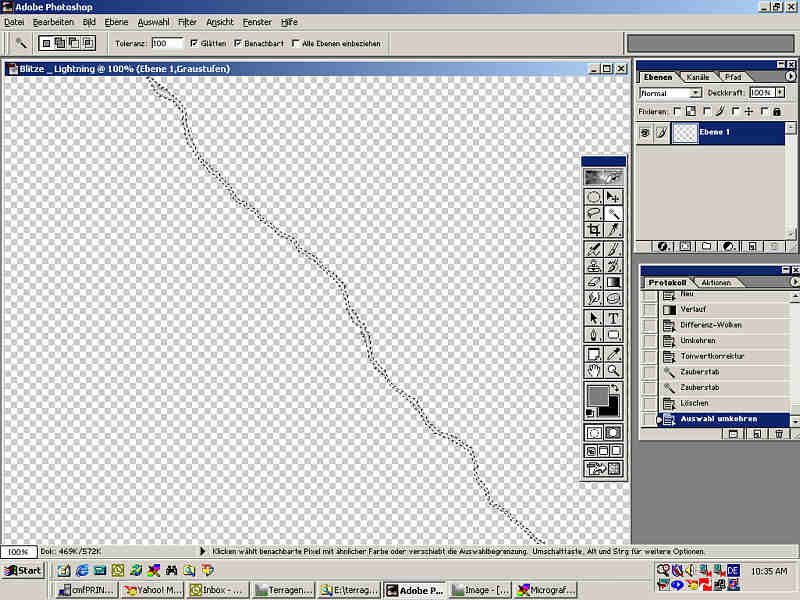
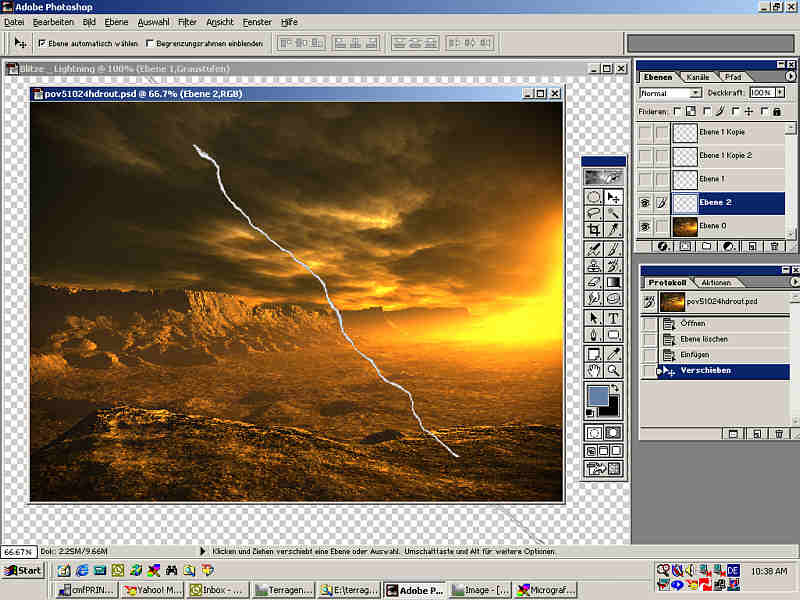
Now invert the selction using shit + strg + i. Like this: We press strg + c in order to copy the bolt. Bringing the background picture to the front, we press strg + v to paste the bolt into our picture. A new layer will be automatically produced, which looks like this: It’s about time to make up our mind where to place
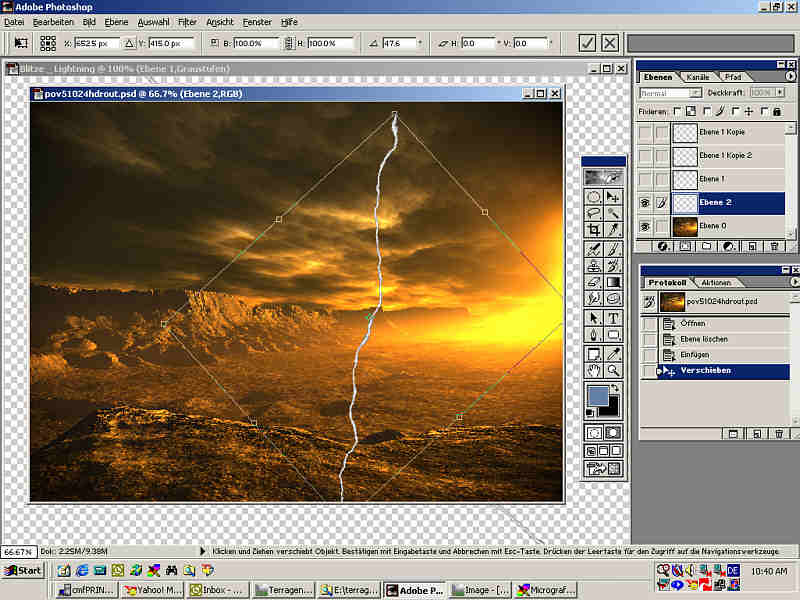
the bolt. We rotate the bolt as we wish and position it where we want
it to be at.
Having the bolt layer selected, we erase all the pieces of the bolt which we don’t need. When we’re done with positioning and erasing until
the bolt fits, we now need to make sure that we take care of adjusting
the brightness and coloring in order to fit into the image. In the layers
menu, we choose “hard light” from the dropdown list. Looks
like this, then:
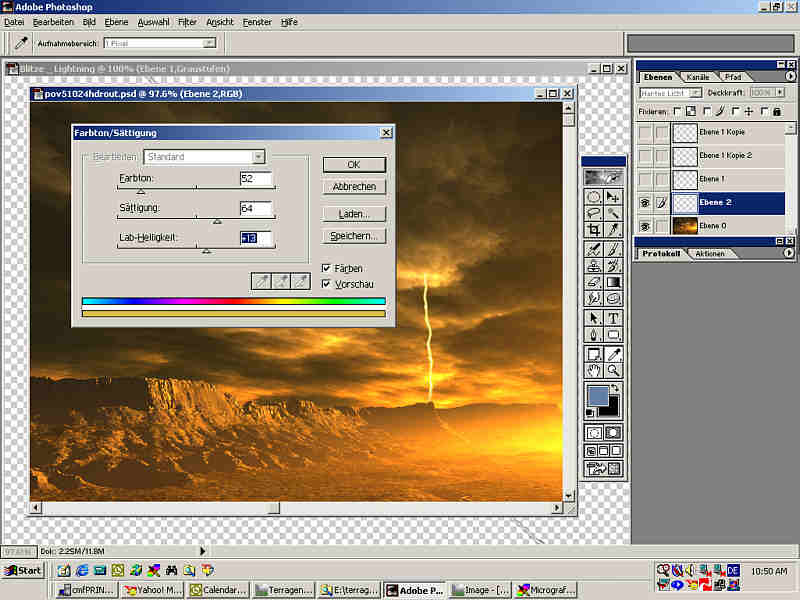
To adjust the bolt further in terms of coloring, we bring up the saturation dialog using strg + u. Make sure you check the „color“ box. We now choose a good color from the upper slider and tune the saturation a bit, using the middle slider. In our picture here, the settings were like this: Now we’re in the phase, that we will want to expose
that part of the sky more, where the bolt is supposed to appear from.
I wanted that part of the sky to be much brighter and faing into a greenish
color with the distance. Choose a soft brush and set the paint mode
to expose. Paint a bit around the sky to lighten up the clouds, until
they’re partially white. Now set the paint mode to colorize, choose
a light greenish color (or any color that you like) and paint aroung
the edges of the area we just exposed. Always use a low opacy for the
brushes. I needed to have the opacy set to around 30%, which may vary
depending on the picture.
I have messed around a bit more here and there, but
basically that was it. I wanted some additional flash where the bolt
hits the ground and where it decends out of the clouds. I found the
lighting effects filter in photoshop unsufficient. Luckily I had Picture
Publisher, which provided me with more control about the lighting. I
used the “Reflex” Filter. And this is the final picture:
|
||||||||||||
 |
 |
|||||||||||