Maybe you have seen pictures before, which
use this trick for enhancing their scene with either beams that vanish shortly
over the ground or scenes that have that strange irregular mist, which is not
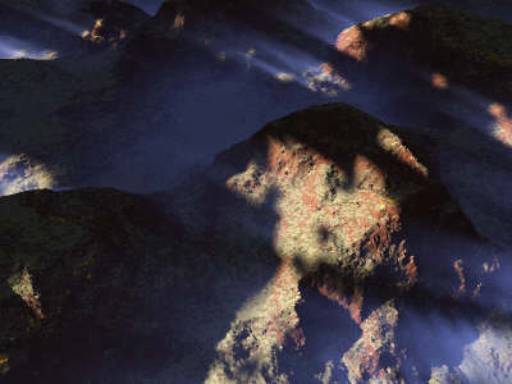
the “weird blue glow”-effect, but something else. An example would be this:
We will use
this picture to discuss how this can be achieved.
Well, this is
not the typical beams that you are used to from many pictures out there. And
it is not fog. It’s a mix between both.
So in “reality”,
what you see here is common sunbeams, but why do they only appear close to the
terrain and do not reach up to the sky? This is what you need to do.
Generate a terrain, whichever you want. It doesn’t really matter
how it looks, but a terrain with some height differences will support the
low beams trick better than flat ones, because of the shadow areas in the
valleys.
Go and produce rays. There are a few tutorials out on the internet
that can explain you how. There’s one here. But a brief
“how-to” would be
Have some clouds and perhaps push up density shift, so that most
space in the sky is covered with clouds
For nicer rays (and clouds), increase the sky altitude to about
300-500
Enable “clouds cast shadows”. There won’t be any rays if you leave
this off
Choose “multi-directional shadow lighting” .
Increase sunlight strength to 300+, depending on the darkness
of the scene caused by “clouds cast shadows”
Increase fog percentage to, say, 30%+
Increase atmosperic blue to about 30%+
There you go. You got sunbeams.
Now the low beams trick is as follows.
The half-height of the atmospheric blue must be set to a value
well below the highest point of your terrain/scene. This is, because you
will want to have the effect in the valleys and not everywhere
Set the half-height of the fog to the same value. The fog isn’t
really a must have, but the fog will blur the rays a lot and make them appear
much softer.
Increase the atmospheric blue percentage to something between
40%-70%. This will make the low beams/fog show up more nicely.
Make sure (!) you choose a camera perspective with land only,
from high above, maybe twice as high as the highest point in your scene.
Why? Because there will be a black sky, because you “stole” the atmospheric
blue from your world, you freak, and are about to use it for something it
hasn’t been intended for!
In the “multi directional shadow lighting” dialog, decrease the
shadow lightness (in the above picture it was at 16), in order to get a
better contrast for the beams/fog
Play with the fog percentage and find out how much you would like
to blur the rays and make look like fog.
For a fog-like effect, also don’t use too narrow gaps between
the clouds. Otherwise it will always look like rays.
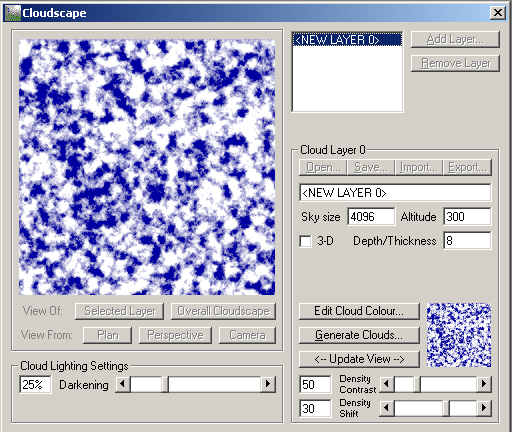
For your convenience, to get a quick look at
the cloud settings for the example pic:
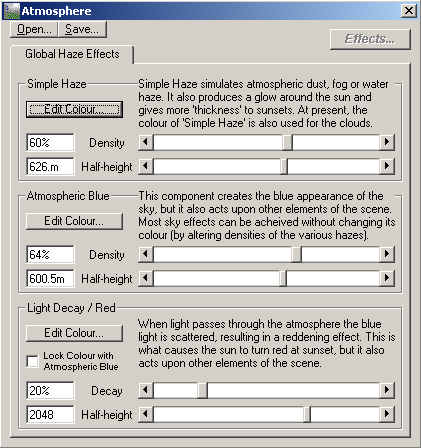
And for the atmospherics: