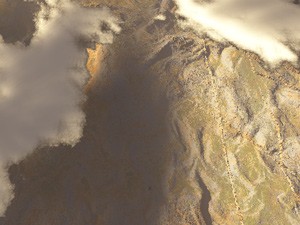
AWACS On Duty
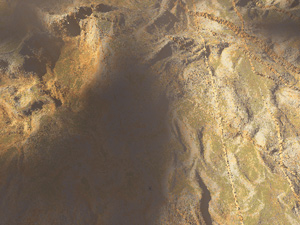
Silence
Many people have come over the fact, that it is not possible to create a picture from above the clouds, using Terragen alone. This is for two reasons:
Another issue many Terrageneers have complained about is, that you cannot position the camera below water.
Just to prove that this can be overcome, look at these two pictures:
|
AWACS On Duty |
Silence |
|
|
|
There’s only little magic here: there’s a checkbox, hidden in the settings dialog under options, called “back face culling (faster)”. Usually, that doesn’t mean anything to you, since any other picture doesn’t seem to be affected by this, except for some differences in render time. So, what the hell is it good for?
To get an understanding, imagine, that when Terragen renders a picture, it woould be unnessessary to renders polygons, which face away from the camera, because you wouldn’t see them anyway. With not rendering these polygons, you simply save time rendering your picture. That’s why this option is turned on by default.
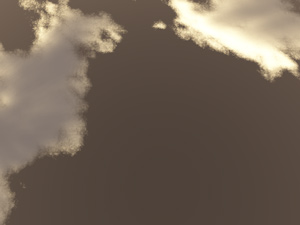
In case of the clouds, only the bottom side of the clouds are rendered by default. If you turn “back face culling” off, the clouds become visible with a camera position from above. Unfortunately, the land gets rendered after the sky and will be placed on top of the clouds. So you will need to render two pictures – one without land and from above the clouds, and one with land, below the clouds – and mask and mix both using a paint program. Now here’s a checklist of what you need to do:
10. Launch Photoshop or something else, mask the clouds, copy them into the land picture and you’re done. This is where you might end up at:
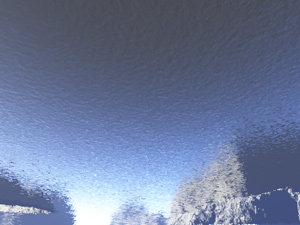
Scenes from under water….How to:
I am just going to explain this. Using any terrain, adjust the waterlevel to any value above the terrain. Position your camera under the water and look up. With “back face culling” turned off, you will see something like this:
Now, you need to know two things about underwater scenes:
That’s it. I hope all this has been explained well enough. Have fun.
back to the Startpage